
Ebook bài tập thủy lực chọn lọc có đáp án Phùng Văn Khương, Phạm Văn
Vĩnh
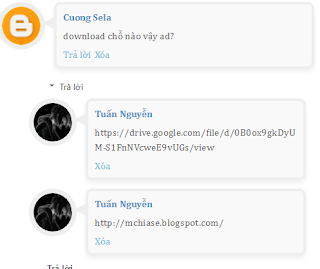
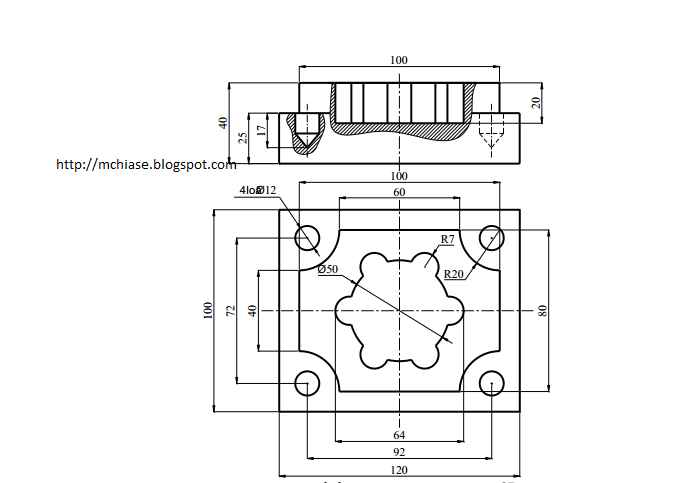
Link down: Bài tập thủy lực thủy khí chọn lọc có đáp án


Go to Blogger edit html and find these sentences.Now replace these sentences with your own descriptions.

Go to Blogger edit html and find these sentences.Now replace these sentences with your own descriptions.

Go to Blogger edit html and find these sentences.Now replace these sentences with your own descriptions.

Go to Blogger edit html and find these sentences.Now replace these sentences with your own descriptions.

Go to Blogger edit html and find these sentences.Now replace these sentences with your own descriptions.


]]></b:skin>
.comments .comment-block {
background: #F9F9F9;
color: #555;
box-shadow: 0 4px 10px #EEEEEE;
position: relative;
margin-top: 10px;
margin-left: 60px;
padding: 10px;
border: 4px solid #EEEEEE !important;
border-radius:10px;
font: 1.190em/1.2 Cambria,Georgia,sans-serif;
}
.comment-thread li .comment-block:before {
position: absolute;
display: block;
left: -26px;
color: #EEEEEE;
content: "\25C4";
font-size: 30px;
}
.comments .avatar-image-container {
width: 60px;
height: 60px;
max-height: 60px;
margin:0px 0px 0 -28px;
padding: 0px;
border: 7px solid #EEEEEE;
border-radius:60px;
}
.comments .avatar-image-container img {
overflow:hidden;
width: 60px;
height: 60px;
max-width: 60px;
border:0 !important;
border-radius:60px;
}
.comments .comment-thread.inline-thread {
background: none;
}
.comments .continue {
border-top: 0px solid transparent;
}
.comments .comments-content .datetime {
float: right;
font-size: 11px;
}
.comments .comments-content .user a{
font-size: 15px;
color: #498EC9;
}
.comments .comments-content .datetime a:hover{
color: #777;
text-decoration: none;
}
.comments .comments-content .comment:first-child {
padding-top: 0px;
}
.comments .comments-content .comment {
margin-bottom: 0px;
padding-bottom: 0px;
}
.comments .continue a {
padding: 0px;
}
.comments .comments-content .icon.blog-author {
background-image: none;
}


<ul id='random-posts'>
<script type='text/javaScript'>
var rdp_numposts=10;
var rdp_snippet_length=150;
var rdp_info='yes';
var rdp_comment='Nhận xét';
var rdp_disable='Tắt Nhận xét';
var rdp_current=[];var rdp_total_posts=0;var rdp_current=new Array(rdp_numposts);function totalposts(json){rdp_total_posts=json.feed.openSearch$totalResults.$t}document.write('<script type=\"text/javascript\" src=\"/feeds/posts/default?alt=json-in-script&max-results=0&callback=totalposts\"><\/script>');function getvalue(){for(var i=0;i<rdp_numposts;i++){var found=false;var rndValue=get_random();for(var j=0;j<rdp_current.length;j++){if(rdp_current[j]==rndValue){found=true;break}};if(found){i--}else{rdp_current[i]=rndValue}}};function get_random(){var ranNum=1+Math.round(Math.random()*(rdp_total_posts-1));return ranNum};
</script>
<script type='text/javaScript'>
function random_posts(json){a=location.href;y=a.indexOf('?m=0');for(var i=0;i<rdp_numposts;i++){var entry=json.feed.entry[i];var rdp_posttitle=entry.title.$t;if('content'in entry){var rdp_get_snippet=entry.content.$t}else{if('summary'in entry){var rdp_get_snippet=entry.summary.$t}else{var rdp_get_snippet="";}};rdp_get_snippet=rdp_get_snippet.replace(/<[^>]*>/g,"");if(rdp_get_snippet.length<rdp_snippet_length){var rdp_snippet=rdp_get_snippet}else{rdp_get_snippet=rdp_get_snippet.substring(0,rdp_snippet_length);var space=rdp_get_snippet.lastIndexOf(" ");rdp_snippet=rdp_get_snippet.substring(0,space)+"…";};for(var j=0;j<entry.link.length;j++){if('thr$total'in entry){var rdp_commentsNum=entry.thr$total.$t+' '+rdp_comment}else{rdp_commentsNum=rdp_disable};if(entry.link[j].rel=='alternate'){var rdp_posturl=entry.link[j].href;if(y!=-1){rdp_posturl=rdp_posturl+'?m=0'}var rdp_postdate=entry.published.$t;if('media$thumbnail'in entry){var rdp_thumb=entry.media$thumbnail.url}else{rdp_thumb="https://blogger.googleusercontent.com/img/b/R29vZ2xl/AVvXsEiLxe4qDWgodJiorrXZe0UB5L-7v8Gg0nRsUOaTFn1JI7qciGthnfeKk5QAg4tcsryctIJSr9jCQqfqG9N2av4K6UnY327buc-MF2Qh5abKg6Jml2C8kIrN2LAOZd9mp3S5pnUNtJh1Iu3b/"}}};document.write('<li>');document.write('<img alt="'+rdp_posttitle+'" src="'+rdp_thumb+'"/>');document.write('<div><a href="'+rdp_posturl+'" rel="nofollow" title="'+rdp_snippet+'">'+rdp_posttitle+'</a></div>');if(rdp_info=='yes'){document.write('<span>'+rdp_postdate.substring(8,10)+'/'+rdp_postdate.substring(5,7)+'/'+rdp_postdate.substring(0,4)+' - '+rdp_commentsNum)+'</span>'}document.write('<div style="clear:both"></div></li>')}};getvalue();for(var i=0;i<rdp_numposts;i++){document.write('<script type=\"text/javascript\" src=\"/feeds/posts/default?alt=json-in-script&start-index='+rdp_current[i]+'&max-results=1&callback=random_posts\"><\/script>')};
</script>
</ul>
 Blogger")
.widget.PopularPosts .widget-content {
  font-size:96%;
  line-height:normal;
}
.widget.PopularPosts li {padding:.5em 0 .8em}
.widget.PopularPosts .item-title a {
  display:block;
  font-weight:bold;
  margin:0 0 .2em;
}
.widget.PopularPosts img {
  padding:0;
  margin:5px 10px 0 0;
  border:none;
  background-color:#111;
  float:left;
}
.widget.PopularPosts a.more-link,.widget.PopularPosts a.more-link:hover,.widget.PopularPosts a.more-link:focus {
  display:block;
  float:right;
  color:#333;
  background-color:#999;
  line-height:100%;
  margin:1em 0 0;
  padding:2px 6px 4px 5px;
  font-size:10px;
  font-style:italic;
  text-decoration:none;
  text-shadow:none;
  -webkit-border-radius:2px;
  -moz-border-radius:2px;
  border-radius:2px;
}
.widget.PopularPosts a.more-link:hover,.widget.PopularPosts a.more-link:focus {background-color:white}
<b:widget id='PopularPosts1' locked='false' title='Popular Post' type='PopularPosts'>
ABC
</b:widget>
<b:includable id='main'>
<b:if cond='data:title'><h2><data:title/></h2></b:if>
<div class='widget-content popular-posts'>
<ul>
<b:loop values='data:posts' var='post'>
<li>
<b:if cond='data:showThumbnails == "false"'>
<b:if cond='data:showSnippets == "false"'>
<!-- (1) No snippet/thumbnail -->
<a expr:href='data:post.href'><data:post.title/></a>
<b:else/>
<!-- (2) Show only snippets -->
<div class='item-title'><a expr:href='data:post.href'><data:post.title/></a></div>
<div class='item-snippet'><data:post.snippet/></div>
</b:if>
<b:else/>
<b:if cond='data:showSnippets == "false"'>
<!-- (3) Show only thumbnails -->
<div class='item-thumbnail-only'>
<b:if cond='data:post.thumbnail'>
<div class='item-thumbnail'>
<a expr:href='data:post.href' target='_blank'>
<img alt='' border='0' expr:height='data:thumbnailSize' expr:src='data:post.thumbnail' expr:width='data:thumbnailSize'/>
</a>
</div>
</b:if>
<div class='item-title'><a expr:href='data:post.href'><data:post.title/></a></div>
</div>
<div style='clear: both;'/>
<b:else/>
<!-- (4) Show snippets and thumbnails -->
<div class='item-content'>
<b:if cond='data:post.thumbnail'>
<div class='item-thumbnail'>
<a expr:href='data:post.href' target='_blank'>
<img alt='' border='0' expr:height='data:thumbnailSize' expr:src='data:post.thumbnail' expr:width='data:thumbnailSize'/>
</a>
</div>
</b:if>
<div class='item-title'><a expr:href='data:post.href'><data:post.title/></a></div>
<div class='item-snippet'><data:post.snippet/></div><a class='more-link' expr:href='data:post.href'>Read More</a>
</div>
<div style='clear: both;'/>
</b:if>
</b:if>
</li>
</b:loop>
</ul>
<b:include name='quickedit'/>
</div>
</b:includable>

